 Kanto Recorder: Your Performance Recorder.
The 1st Video / Music / Voice and Webcam Recorder Software
Kanto Recorder it is not a simple Karaoke Recorder that allows you to record your voice to your favorite songs (audio and video), but it is also a Webcam Recorder that is, it records you in real time while you sing, making you truly the protagonist!
With Kanto Recorder you can make different types of high quality audio/video recordings simply by using your computer and a microphone! Here is a screenshot of the program in action during the video, audio and webcam recording function!

Kanto Recorder main features
- Record your voice on any audio or video file.
- Possibility to activate the webcam and record your face during the performance
- Webcam recording can take place in Picture-in-Picture mode (window at the top right of the video) or in full screen mode
- Record your singing performance also on YouTube music videos
- In the event of not perfect synchronization between audio/voice, the “delay” can be adjusted
- Preview the output file by choosing between MP3 audio files or MP4 video files
- Supports video recording from both PC built-in webcam and external webcam (usb)
- Supports voice recording from a microphone connected directly to the computer (and not to mixers or external sound cards)
- Audio/video recording takes place directly from the PC’s internal audio/video card and with a stereo audio track
- The demo and free trial version of the program allows you to record up to 60 seconds
How Kanto Recorder works?
Kanto Recorder is a program to record your voice while you sing on any backing track (audio, video), giving you the possibility to read the karaoke lyrics while you sing. At the same time the software allows you to activate the webcam to also record your face and create a video with your singing performance and share it with whoever you want.
However, this software can also be used to record your voice on movies or video clips, for example to make a video tutorial or presentation, and even in this case the presence of the webcam in picture in picture mode will allow you to customize the final result .
The operation of Kanto Recorder is really simple. Here is a detailed guide describing all the steps to follow to use the software correctly.
Step 1. Download and install Kanto Recorder
To get started, download Kanto Recorder to your Windows PC (it’s not currently compatible with macOS).

After downloading, double-click on the .exe file to start the installation. Once complete, the following home screen will open:

Step 2. Import audio/video files you want to record your voice on
At the top left of the screen you can import the video or audio file on which you will be able to record your voice. Click the three dot button to select the file from your computer.

Alternatively, it is also possible to select the “YouTube link” box and enter the URL of a video to download on YouTube. The video will be automatically loaded by the program and once ready a warning will appear as seen in the following figure.

Step 3.Connect microphone to PC
The software will activate the internal microphone of your PC defautly. But for a better quality recording it is definitely better to use an external microphone (e.g. USB microphone) to be connected to the computer. Once this connection is made, press the blue icon to update the connected devices and then select the microphone from the drop-down menu.

When speaking into the microphone, if you see a green indicator moving across a horizontal bar then everything is fine. By deselecting the “Mute” option, you will also be able to hear your voice from the computer speakers. However, we recommend selecting Mute for better recording quality (voice will still be recorded).
From the Voice Effects section below, you can instead apply an effect to your voice. There are dozens of ready-to-apply effects such as Chorus, Echo, etc. Select the desired effect and test it by speaking into the microphone (after deselecting Mute).

Step 4. Enable webcam recording (optional)
If you also want to record your face as well as your voice, all you have to do is activate the WebCam function by moving the relative cursor from OFF to ON. If the computer webcam has been selected, after a few seconds you will see your image appear at the top right of the screen.

If you want to use an external webcam, just connect it to the computer via USB and then select it from the drop-down menu in the program (after pressing the blue icon to update the devices). The external webcam certainly allows you to obtain a video recording with higher quality and resolution than the one integrated in the computer.
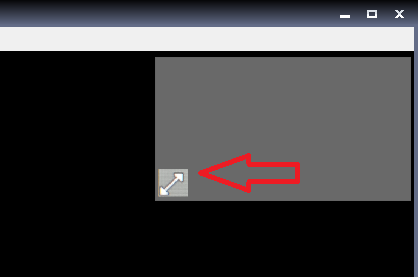
If you want to enlarge or reduce the webcam window (which appears in the upper right), just (with the webcam deactivated) move the mouse to the lower left corner and then drag the rectangle until you reach the desired size.
Before starting the registration you can decide between the following two options:
- Video + Webcam [PIP]: allows you to record video and webcam at the same time, with the WebCam appearing in the top right pane
- Webcam only: allows you to obtain an output video file with the one taken by the Webcam
Step 5. Start recording
Now that you have set up both microphone and webcam (optional) you can start the actual recording. Click the red circular button ![]() and the software will start playing the source audio/video file. At this point you can start talking or singing into the microphone and the program will record everything. If you are a Karaoke enthusiast, you can easily record your voice while reading the lyrics scrolling across the software screen.
and the software will start playing the source audio/video file. At this point you can start talking or singing into the microphone and the program will record everything. If you are a Karaoke enthusiast, you can easily record your voice while reading the lyrics scrolling across the software screen.
When you click on the registration button, a warning will appear that you are using a DEMO version of the program. This demo version allows you to play and record for up to 60 seconds. After 60 seconds the recording will stop and the save window will appear.
The save window opens automatically when you click on STOP or when the 60 seconds of playback of the DEMO version run out. Here’s what this screen looks like:

Before saving the recorded file on your PC you need to select the desired format (MP3 or MP4) and listen/view the preview. Click the green circular button to listen to the audio M3 file, or the yellow circular button to view the MP4 video obtained from the recording. If the preview is OK, click on Save On Your PC to save on your computer.
[Optional] Adjust delay and volume parameters
If you experience delays in synchronization between voice and song or volume between voice and audio video, you can solve this thanks to the Audio/Video delay parameter. Move the cursor to the left if you want to “earn” your voice (each notch equals 10ms of advance or delay that will be applied).
Instead, if you notice that the volume of your voice is too high or too low compared to the base, thanks to the Audio Levels Balance parameter, you can adjust and get the best result. Move the cursor to the right (towards Voice) to increase the volume of the voice, or to the left to obtain the opposite effect.
It is also possible to apply an effect to the voice (if you have not applied it before). You can choose between Echo, Chorus and other effects.
After each change you can always listen to the preview by pressing the MP3 or MP4 button. Once the result meets your needs, you can finally save the final file by clicking on the SAVE ON YOUR PC button.
If, on the other hand, you want to re-register, press the CANCEL AND CLOSE button: the program will return to the initial screen and you can re-register to get a better result!
PRO version license
By purchasing the PRO version of the program you can remove the 60 second limit of the demo version. Click the button below to access the purchase page and order the license (1 year license and free updates in the year).

Immediately after the purchase you will receive an email and a license code that you will need to enter into the program. Click on the PRO version button at the top and the window will open in which to enter the data for activation.

Logs and videos downloaded from YouTube
The software saves various information on the computer in order to function correctly and to report any bugs. To access the folder where these logs are located and where YouTube videos are also saved (when you select YouTube as source) here are the steps to follow.
- Go to the Windows search bar and type %AppData% and press enter
- The Roaming folder will open. At this point search for and access the KantoRecorder subfolder.
- Here you will find a tmp folder (which contains the program log files and temporary files used during recording) and a YouTube folder which will store all video files downloaded from YouTube.
- In case of program activation with relative license, a reg.dat file will also appear
